Windows 11 host delivery optimization is a lot irritating for many people, and there are multiple reasons to hate it. The main reason everyone hates Windows Delivery Optimization is that it sucks all your internet bandwidth, and it makes to sit empty-handed.
There may be tutorials on the internet to turn off the host delivery optimization, of course, they work pretty well. But many users reported that after updating windows, it automatically gets turned on. Well, Microsoft never really wants you to turn off the Delivery Optimization, but you can follow the following tutorial to disable it.
But first let us clarify that, if you think you can disable it from Settings, LOL, it never works. There is a toggle button in the settings as Allow downloads from other PCs which sounds like it can disable the Delivery Optimization permanently, but it is just limited to Downloads.
What it means is, Delivery Optimization is similar to torrents, where, when you download a file, it doesn’t connect to a server, rather the download happens from another user’s device, and your device will send a certain amount of data to other users. (Peer-to-peer connection)
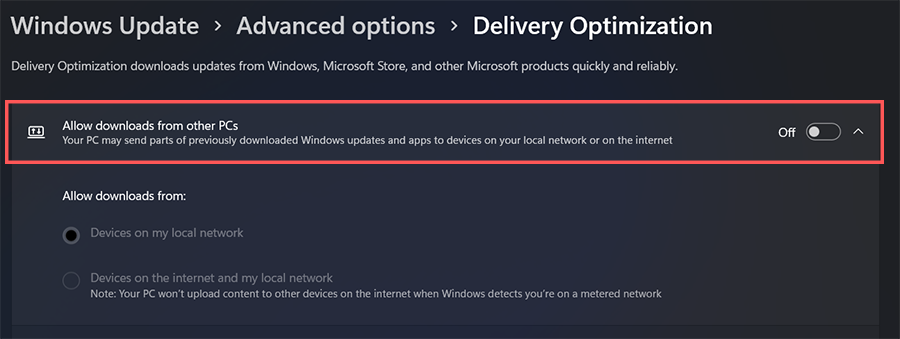
Similarly, when you turn off the Delivery optimization in Settings, it will start downloading updates directly from the Microsoft server rather than downloading it from another PC, but it will never stop uploading which continuously consumes data.

Also, there is no official way to disable Delivery Optimization upload, hardly all you can do is, you can either reduce the Upload speed or set a limit for upload size.
So! to finally get rid of this issue, here’s the solution, this is how you can disable the Delivery Optimization permanently on Windows 11.
1. Disable Windows Delivery Optimization using Services.msc
This is one of the easiest ways to turn off Delivery Optimization permanently on Windows 11.
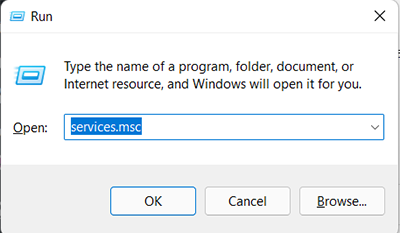
First, press Win+R and type services.msc, and then press ok. This will open a new window where all the services will be listed.
Then, from the list of services, search for ‘Delivery Optimization’ and open its Properties by right-clicking on it.
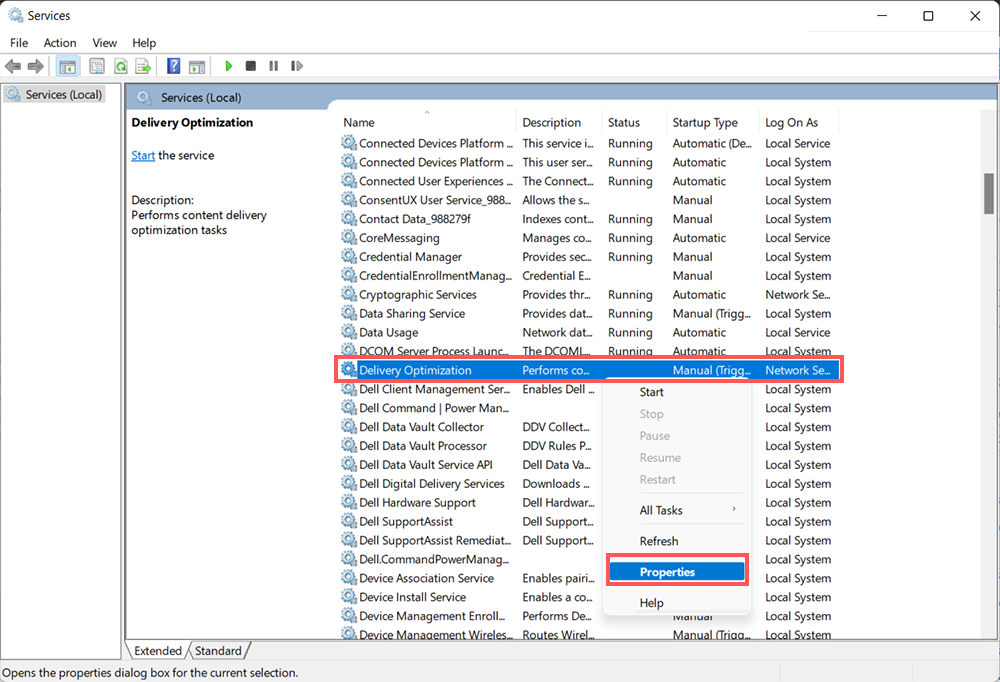
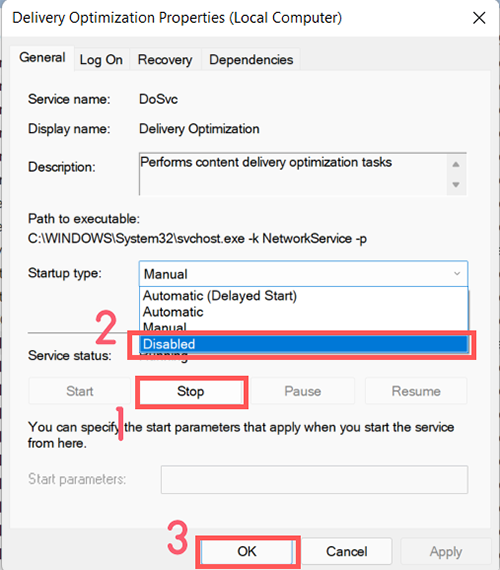
Now, Stop the Delivery Optimization service if it’s already running, and then set the startup type to Disabled and hit OK. Once you have done with everything, restart your PC.
Most of the time this will solve your issue, but in some cases, you might not be able to perform it and it may throw an error ‘Access Denied’. In that case, you can try other methods mentioned below.
2. How to permanently Disable Delivery Optimization using Registry Editor
Disabling the Delivery Optimization from Registry Editor is quite is, but it may feel confusing in the beginning while navigating to the DoSvc.
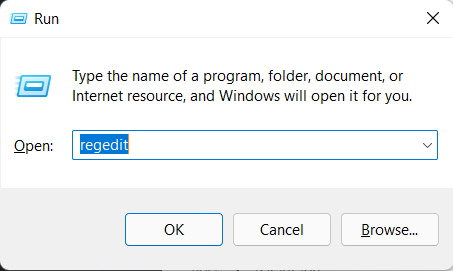
You can open Registry Editor by using windows search or by running Regedit run command.
When you open the Registry Editor, you have to navigate to HKEY_LOCAL_MACHINE\SYSTEM\CurrentControlSet\Services\DoSvc. You can navigate to the DoSvc using the dropdown directory tab at the left.
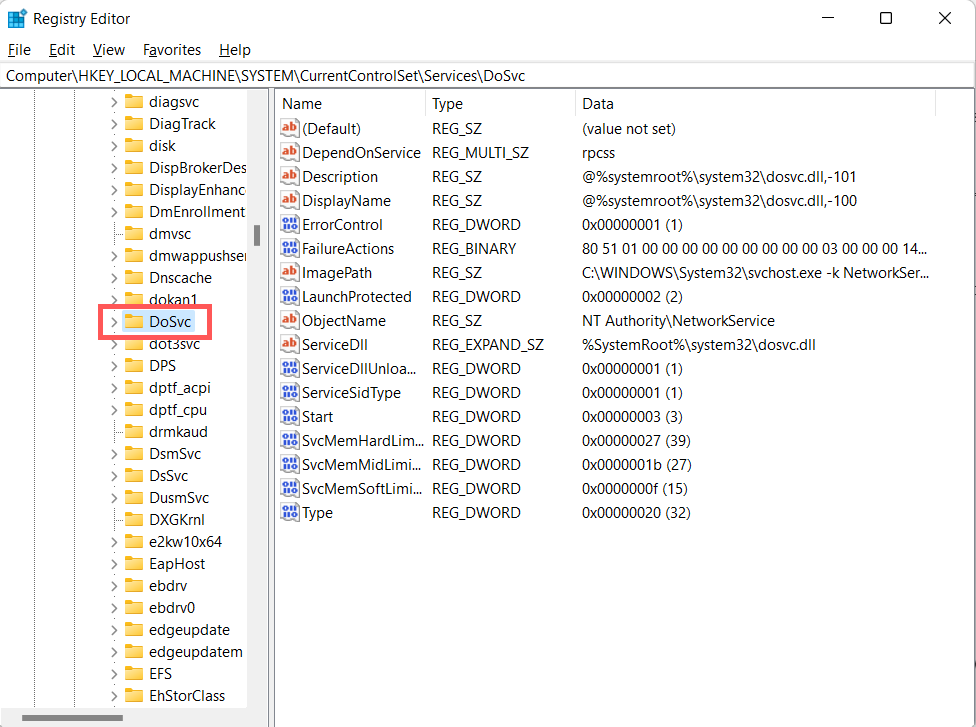
Once you successfully navigate to the DoSvc directory, you will see multiple registries, from that list, double click on Start, change the Value data to 4, and press ok. After performing the changes, restart your PC to see the results.